Sunday, November 20, 2022

Color Test: Green Mallard

I am NOT going to repaint this car in its original "Harvest Gold" color. I absolutely hate that color. But I really want to try to stay with an orignal color choice, and like the dark 'British Racing Green' on these cars.

"Green Mallard" was one of the original factory colors offered in 1972 for the MGBGT. It's a fairly unusual shade of green, and it's difficult to find good color references for it. The factory color code, BLVC22, is no longer known in any current paint databases, and I don't have access to an original-paint car to take a color sample. One has to rely on color cross references found online, that are also very old themselves.

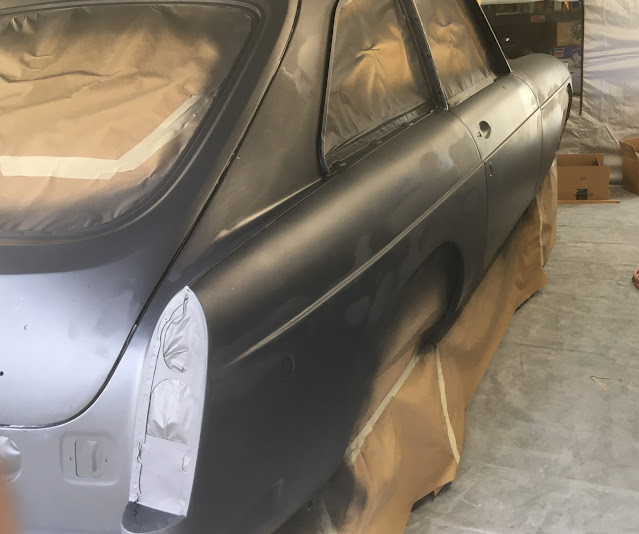
I just did a test sprayout, with some of the topcoat that I'm probably going to use, to check for color. It's a PPG single-stage urethane from their "Concept" line. This is PPG's best and very expensive, so I only got one pint of color mixed right now. I used a hastily prepared panel that I had cut off from a fender previously (so it still has some rust holes). This Concept really sprays out nice - flattens very nicely right off the gun without having to pound it on. For this test the gun I used was an Iwata Kiwami 4-13BA4 with 1.3mm cap. For only about $160, it's a really nice spraying gun.


I had to get it out in the sunlight to see the true color. The 5600K shop lights just don't have much color spectrum in them. The color really woke up when I got it out in the sunlight. Looks about right for green mallard I think.


Sunday, November 13, 2022

Urethane surfacing primer

 This was after applying two coats of a urethane primer/surfacer - PPG Omni MP282. I wasn't very pleased with the application of the Omni 282 - it sprayed very dry and dried so fast that a lot of dry overspray was created. I had to work fast to keep a wet edge when spraying. Part of that, I'm sure, was due to using the fast reducer and hardener I had purchased in anticipation of spraying in cold weather. Well, it turned out to be an unseasonably hot day when I sprayed it.

I block sanded this with 320 then finished it with 600 by hand. I wanted to get a slick finish so that I can preview the flatness to see if it's ready for paint.

 
It was rolled out of the shop to be washed down. All the accumulated sanding dust was rinsed thoroughly, inside and out.
 
While it was wet, I had the opportunity to evaluate the flatness by examining the reflections on the wet surface. Found just a couple spots that will need further attention.


Wednesday, November 2, 2022

Block sanding the polyester primer

Twenty four hours after spraying the G2 it has hardened well for sanding. I rough-blocked it with 80 grit to break the polyester 'glaze' and knock off the worst of the orange peel. That was followed with a misted spray-on black guide coat. This will next all get knocked down with 180 grit to prepare for a couple coats of urethane surfacing primer. In the process, most of that 1-gallon of polyester primer will end up being sanded off, remaining only in the formerly low spots.


Polyester surfacing primer

Sprayed one full gallon of the Evercoat Feather Fill, G2 polyester primer/filler. This fills all the 80 grit sanding scratches, the pinholes, and most small voids, waves, and irregularities in the body filler underneath. Now most of this will get sanded back off, leaving a perfectly flat surface, I hope.


 I had some paniky, near-disaster, moments when spraying this. The spray gun I used was a cheap LVLC gun and the packing nut for the needle loosened up on me in the middle of the 2nd quart. Well, these guns have a pressurized cup, and it was a full cup. So, when I tipped the gun to do the roof the G2 started squirting out the back of the gun past the needle packing. It made a huge mess, and left great big splatters everywhere on the roof, my coveralls, and the floor. Big cleanup mess!

The good thing is that this stuff hardens just like filler - it's catalyzed with the same type of hardener used in body filler. So the big drips hardened up just as well as the rest of it. Fortunately it sands well. I knocked the drips all off quite easily with 80 grit sandpaper.

It's also kind of a pain in the ass to have to clean the whole gun out after every load. The stuff reeks for hours too. No way you could work with this stuff without a good respirator. But the smell was mostly gone after it hardened.


Sunday, October 30, 2022

Sealing the body filler

 Sprayed one coat of dark gray epoxy this morning. There were already a couple coats of light gray on the car over the bare metal, but I ended up sanding through to the metal in several places when I was blocking out the bondo. So, those spots had to get recoated with epoxy for corrosion protection and proper adhesion of the polyester filling primer that is to soon follow.

I decided on dark gray because... the paint store is closed weekends! I had just enough light gray in one can and and black in left in another can to mix together enough to make 1 quart combined. That was enough to cover the bare spots and to complete one overall thin coat.

But this color will work out pretty well for me. The next coats will be the Feather Fill G2 polyester 'primer' in the 'Buff' color. When I block sand that this dark gray base will make it easy to spot the moment that I get close to breaking through and can go no further. 


You can see the numerous spots where the epoxy covered bondo by the dull patches. Some of that is sanding scratches and some of it is because the bondo is porous and sucks up the paint. All sealed and non-porous now though.


Saturday, October 29, 2022

Time to level the bodywork

 With the body back on the bodycart and all reassembled, it was time to begin the process of leveling all the metalwork and adjusting and improving the shut line gaps. Fixing the gaps involved not only adjustment of hinges and attachment position, but also some metal hammering and bending. I got it to a point where the metal was close as I could get it. Then filler would be used to refine the fit and flatness further.  

 
The filler I'm using is Evercoat Gold. Goes on smooth and sands easily. 90% of this got sanded back off, as the thickness was less than a mm in most places where applied. A 16" flexible sanding bar was used with 80 grit sandpaper to get it leveled down to the point where filler only remains in the low spots.


Sunday, September 25, 2022

Paint booth in a bag

 I've been puzzling over a way to set up a temporary paint booth. Have done it before using PVC pipe as a framework covered with plastic film. But the cost of these materials today has gotten ridiculous. Then I found these cheap party tents that were available in a size that would be just right for my shop space. Everything packs into a bag for compact storage. 


This opens up to a 10' x 20' popup style tent and comes with six removable side panels to make a fully enclosed space. It takes two people to erect this, with one person at each end to pull open the structure. 


Two of the six side panels have full-height zippers that can work as entry doors. The other four have screened windows that have zippered covers. I arranged the zipper panels to give access from each side, and the window panels at the long ends. These will be set up with filters and fans later for airflow.


Monday, September 19, 2022

Undercoating

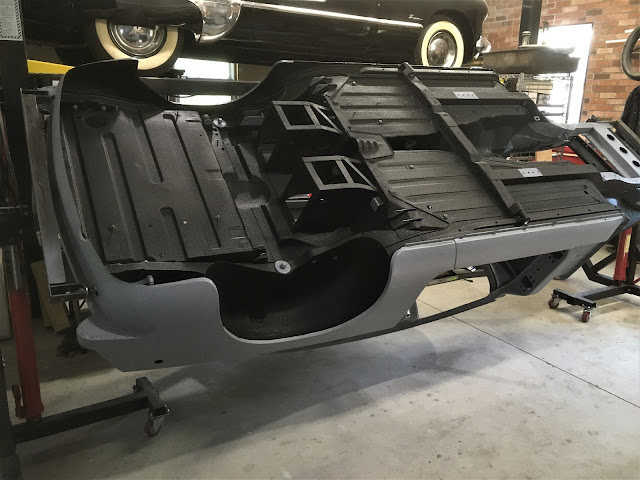
 This week was the application of the U-POL Raptor 'bedliner' as undercoating. This was sprayed using the supplied shutz gun that came with the 4-qt kit Raptor kit. 

As an experiment, I mixed a quart of 'weightless' glass microsphere powder with the first quart of Raptor to be applied to the tunnel and floors to serve as a thermal barrier. The microspheres, also sometimes called microballoons, are hollow bubbles of glass. Adding this to the Raptor makes a kind of foam out of it, in effect. I don't know if anyone has tried this before with the Raptor bedliner, so the effectiveness is uncertain. Had to add about 20% thinner to make it sprayable after the microspheres had thickened up the mix. 


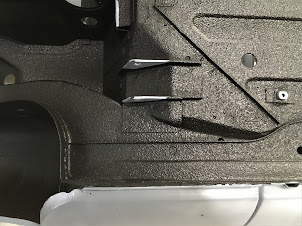
The remaining 3 quarts of Raptor were applied as normal in 2 coats, except that I did find that it needed thinning a bit to achieve the texture that I wanted, The objective was to try to mimic the texture of the factory original tar-based undercoating. I think it came out a bit rougher, but still close. Some areas will be painted over in body color - the wheelhouses, firewall, etc., where the factory originally painted over the undercoating.


Sunday, September 4, 2022

Undersides get primer

Got the bottom sandblasted. Since most of the surface had already been stripped, this was just to get into the otherwise inaccessible corners and crevices.


2 coats of epoxy primer were applied to seal it all up.
Next steps will be seam sealer, then UPOL Raptor bedliner over all the areas originally covered with factory undercoating.


Friday, August 26, 2022

Battery box

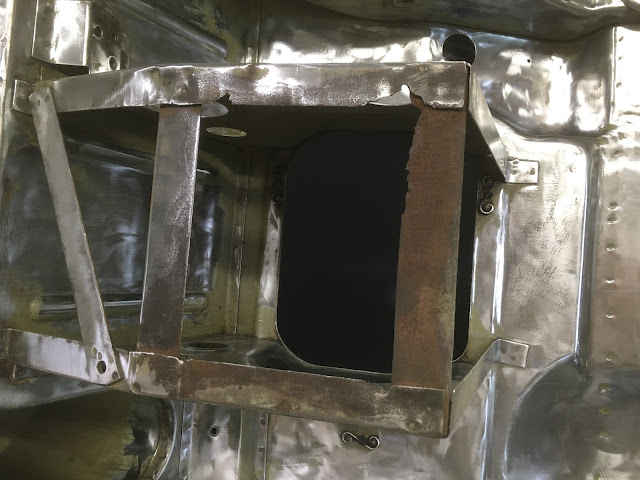
 Rusted metal cut out, and new metal formed and welded in. These battery boxes are a bit small for a modern 12V battery. The car was originally fitted with two smaller 6V batteries connected in series to get 12V. 

6V batteries are an obsolete technology now, but I repaired the battery box to original dimensions for sake of originality. I'll figure out some way to fit a 12V battery later. Maybe a compact lithium battery will fit.


Wednesday, August 24, 2022

Underside repairs

 There are a few damaged areas below that will need fixing. Left-side battery box is rusted out at the bottom. The forward leaf spring mounts have worn egg-shaped. Those will get welded up and resized. And there's a dent in the frame rail that I'll need to massage out.