Thursday, July 22, 2021

LF Wing lower panel replacement : replacement

 Before fitting the new replacement panel, the attachment surfaces on the wing need to be cleaned up and prepared for welding.

But there are also a couple new simple metal pieces that you need to fabricate. Examine the old lower panel that was cut away. You can see a reinforcing strip where the lower, unsupported wing edge (at the front sill area) meets the edge at the door line. This reinforcement is needed to prevent a stress crack forming in that unsupported corner. 


This piece is made from flat 16g sheet steel stock. A 1/8" bend is formed into one edge to act as a stiffener. Then the strip is curved slightly to match the curve of the wing. 


The reinforcement needs to be spot welded to the new lower panel before attaching the panel to the wing.

Another tiny reinforcement strip, also 16g, needs to be made for the front junction of the lower panel in the wheel arch.


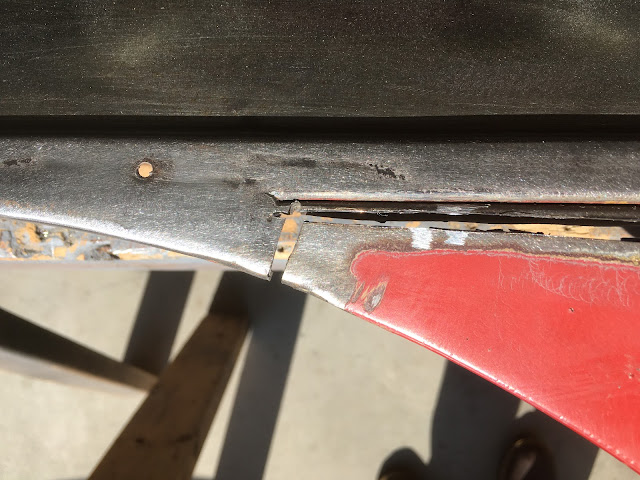
Now it is time to trim the wheel arch junction to match the new lower panel. Trim this to leave about a 1mm gap with the lower panel positioned for best match with the curve of the wheel arch and alignment for the door.  


 When everything is aligned, clamp in place with locking pliers to prepare for welding.  


Rather than plug welding, I did all the welding with TIG, and all spot welds are a weld-through method with no holes drilled. This method results in a weld similar in size to the factory spot welds and is quick. A tiny drop of rod is melted onto the spot and then heated with the TIG torch until it just starts to penetrate through both layers.


The flanges at the rear edge are folded last.  before folding. There are special tools made for folding the edge, which I don't have. So I just used a body hammer and bucked the other side over a sheet of wood. But be sure to redo the 4 spot welds on the folded flange.
This will be the edge visible at the door gap, so take the time to make this straight and smooth. 


LF Wing lower panel replacement : removal

Previously, I noted that the front left wing lower portion had some rust-through. So this entire lower section will be replaced with new. I would rather replace the entire lower section rather than just cutting out the rust and patching in small pieces beacuse then there are no mid-panel weld seams to try to blend. This lower section was already a separate component as originally manufactured, so repairing this way will be nearly indistinguishable from the original. 


  Since I wasn't trying to preserve the original panel, the quickest way to start was to cut the main part of the panel off with a cutting disc.  I cut the rear edge free at the raised edge where the doorline meets. This cut line avoids the inner structure that you don't want to cut into.


 I made one long cut just below the trimline seam. 


 Cut just behind the factory weld in the wheel arch (you can see the weld from the inside). Leave enough behind the old weld so that it can be trimmed to exact length later.

 With the old lower panel cut away, the rear folded edge remains to be removed. I grind the edge with a coarse sanding disc until it just penetrates. This lets the lower half fall away.
The other side is spot welded in about 4 places, so those welds need to be cut free. 


Now the remains of the horizontal trimline flange have to be cut free. First you need to see where the welds are, so running a sander lightly over the surface reavels dimples which are the factory spot welds.

 I use a carbide burr in a die grinder to grind down the spot welds from the scrap side. You only need to thin down the weld area, don't have to cut all the way through.

 Now the scrap flange material can be peeled away with pliers. 


 This leaves behind some thin tags that need to get ground off completely afterward, during which the rusted seam area also gets cleaned up to bright metal.